
I know it has been a while, a very, very long while but for those that may not know I am in the middle of rebuilding my life. On January 31st, shortly after my last post here a fire consumed my home and everything with it including my beloved pets. Only Samhain and I remain along with my turtle Fred. While I am not able to create on the scale I was for a while I can show you some things I am doing to pass the time while I rebuild my home.
Pottery Barn Skull Vase Tutorial

I LOVE these vases but at $150.00 each and the fact that enough people bought them for them to sell out had me thinking of a way to recreate them for myself.
 |
| Supplies |
You Will Need:
• A package of Sculpey, Fimo or Premo Polymer Clay - Transparent is best
• Sculpey tools or make-shift ones found around the home
• Glue (depending on the type of vase you use) I used Elmers China and Glass Cement
• Aluminum Foil
• Heavy Duty Elastic Band
• Toaster oven or regular oven
• Spray Paint Satin Finish in Ivory
• Van Dyke Brown Acrylic Paint
• Paper Towels
• Vase of your choice
• Plastic to protect while painting
First Step:
 |
| Thick sturdy foil draped over the top of the vase for clay support |
Lay the vase down on it's side and wrap a thick layer of foil over it but not around it as you will have to remove this later. The thick layer is meant to hold it's shape when you remove the foil for baking.
Condition your clay by kneading it until it is soft. I used a half a package for my skull. If you would like to have a skull closer to that of Pottery Barn then you can use less.
Roll the clay in between your palms loosely so it forms a sort of UFO shape.
Place the ball on your vase and begin to push down to flatten the edges while pinching the bottom to make the jawline.
Use your finger to smooth the surface.
 |
| Rock the ball of clay into a UFO shape |
 |
| Flatten the ends of the skull while shaping the jawline |
Now take your tools and begin to shape the face as so:
 |
| Use a rounded end to make the eyes |
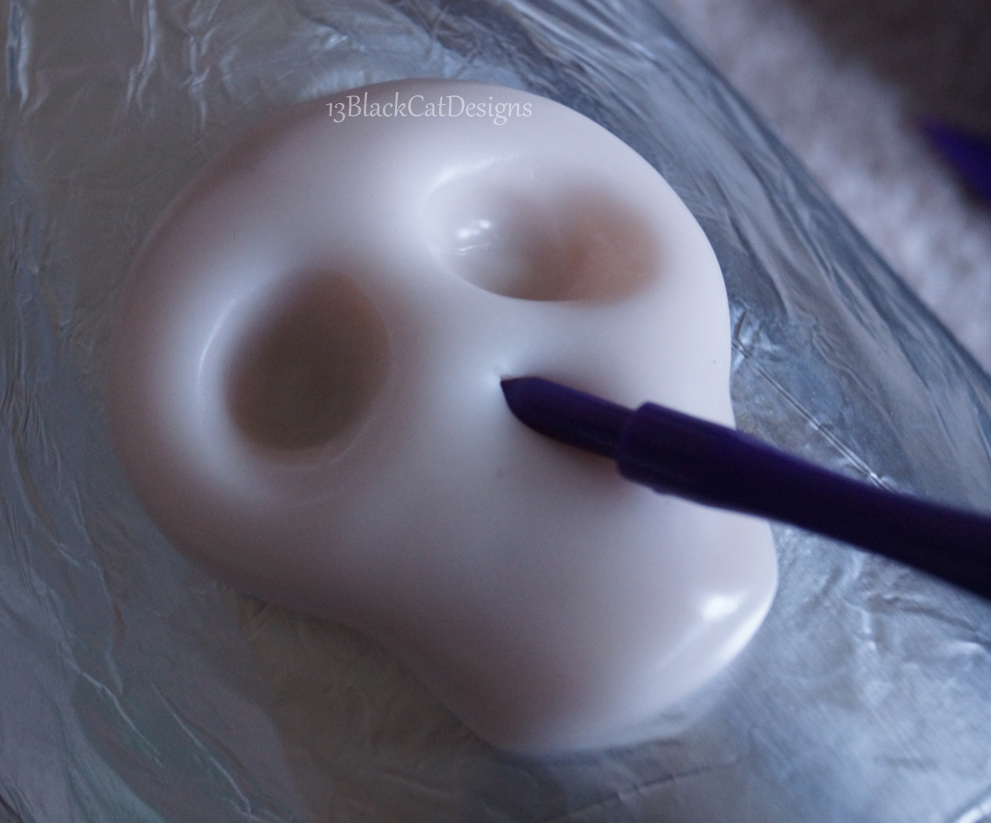 |
| Use a pointed tool to make the nose |
Do the same for the nose
 |
| Cut in teeth |
 |
| Lines for teeth, make tops bigger than the bottoms |
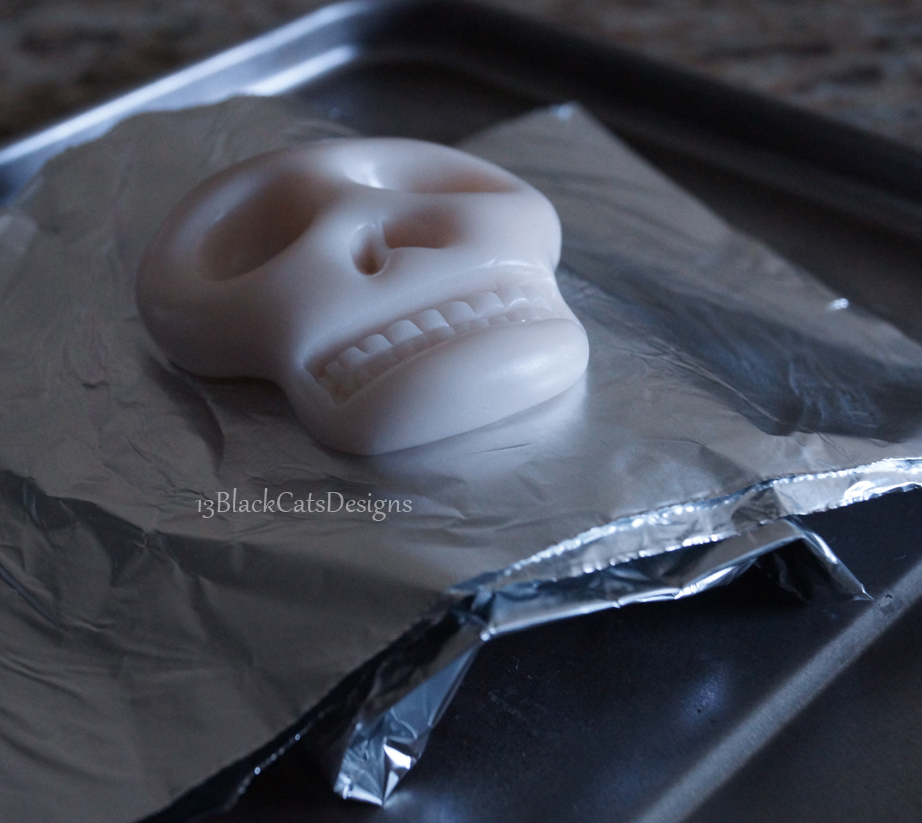 |
| Ball up the foil underneath for support |
 |
| Secure with a rubber band |
After your skull has baked and thoroughly cooled adhere it to your vase. Hold firmly for a minute and use a strong rubber band to keep it in place as the glue dries.
Once the glue dries take your vase outside and give it a few coats of spray paint. (Just make sure it is not too windy or buggy. I had to do some sanding and fixing of little buggy corpses)
REMINDER: Several thinner, even coats from further away are best when spray painting. Too close or too thick a coat will cause drips.
 |
| Needs a few more coats |
 |
| A Happy Accident! |
It seems that it was a bit too moist out to really spray paint but it turned out ok in the end. If you would like to get a bit of a crackle effect try dabbing a VERY thin layer of water in little spots (I would suggest using a scrap piece of something handy to practice and make sure that is the effect you are going for) Very little moisture will work so don't go crazy.
 |
| Get Gloppy With It |
Now here comes the fun messy part. To antique your vase add a fair amount of water to your acrylic paint. It should be soupy but not too thick. Take a paper towel and drench it in the mixture then daub it on the vase working in small sections. Take a second paper towel and using a combination of pats and wipes begin to remove the paint. Do not remove all of it and try to keep the aging effect inconsistent. Take your time but know if you mess up (Are there really any mess ups?) You can wait for it to thoroughly dry and re-spray paint the vase to start over.
 |
| I prefer the matte look however you may spray your piece with a clear gloss It is your vase, Have fun with it! |
Well, there you have it, I hope you enjoyed my first tutorial of this caliber!
My vase ended up costing a little less than $30 but that is because I had to buy a vase and supplies as opposed to using ones I had. I did use a 40% coupon for Michaels (or ACMoore, I forget which I was in at the time) to lessen the cost of the vase.
My vase ended up costing a little less than $30 but that is because I had to buy a vase and supplies as opposed to using ones I had. I did use a 40% coupon for Michaels (or ACMoore, I forget which I was in at the time) to lessen the cost of the vase.
Please feel free to share this tutorial but make sure you give credit (It is just the polite thing to do) If you make a vase please also share what you have done. I am considering making a few tutorials as a way to pass the time and I would love to see what all of you have done too!
.


